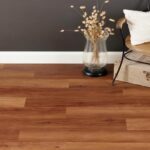
If you are familiar with vinyl plank flooring, you’d know that its installation is not a big challenge. Vinyl floors are stylish, durable, and cost-effective. Their unique designs add an effortless element of style to your space. Whether it’s the bedroom or living area, these floors are versatile enough to fit every space. If you have some experience with doing handy work around the house, the installation of luxury vinyl planks floor will be a piece of cake. Let’s dive into what you need to install this amazing flooring in your house.

Tools & Supplies You’ll Need For Installation
- Measuring Tape
- Utility Knife
- Hammer
- Nailset
- Rubber Mallet
- Straightedge
- Fine Tooth Saw
- ¼ Inch Spacers
- Pliers
- Sander
1: Plan Layout

Planning the flooring layout is important because you don’t want the floor to blend in. A unique pattern like stagger or herringbone will make the floor stand out and add more depth to the space. You can choose the flooring pattern according to what meets your aesthetic preferences.
Flooring layout should begin with the most visible wall of the room. Most of the time, it’s the wall that you see as soon as you enter the room.
Step 2: Clean Area

If you want to discard the old flooring or remove moldings and trimmings, it would help you a lot. A clean canvas allows for a smooth and quick installation and without moldings in your way, you can finish the job faster.
If you have moldings on the door case, leave them. Removing them can be messy and time-consuming. Instead, you can cut them at the button and create some space for the new floor. For clean and precise cutting, you can use an undercut saw. If you have an electric multi-tool, that can be used as well.
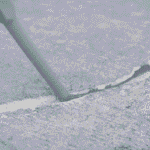
Step 3: Prepare Floor

Now comes the floor prep and it is critical for the stability of vinyl flooring. If the existing floor has any bumps, they should be sanded to create an even surface. In case of cracks or small holes, which is common in concrete floors, fill them up with a concrete patch product. Make sure that you apply the product evenly and then leave it to dry and harden.
Step 4: Test Fit

Doing a test fit for the planks by laying them out on the floor to visualize their pattern will help avoid any mistakes. Ideally, you should begin in the center of each opposite side wall. This way the cut planks will go in the corner and have equal lengths. Moreover, the layout will be more cohesive and visually appealing.
Don’t forget to leave a ¼ inch of gap between the wall and planks to leave space for planks to settle without buckling. If you are worried about the gap not being uniform, you can use spacers to ensure the gap is equal on all sides.
Step 5: Plank Cutting

When you are ready, start cutting the planks with a utility knife and use a carpenter’s square for precise measurements. The best way to cut the planks is by cutting across the planks lightly, multiple times. Instead of going at it once, doing it gently will ensure a cleaner cut. You can then turn the plank over and try to fold it back. This will cause the plank to snap off easily. If it doesn’t, you can make another cut by lightly running the knife through the previously made cut.
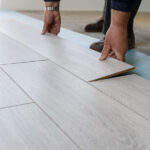
Step 6: Lay Planks

Now it’s time to lay the planks by arranging them side to side. The fold and lock system of the planks will cause them to snap together. After laying one plank flat on the floor, adjust the second plank at an angle to fit the grooves of the first plank. When the planks lock together, they will create a seamless fit. Repeat this for all the planks in your decided layout pattern.
Step 7: More Cutting

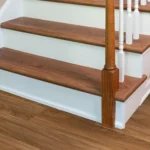
If your room has any permanent fixtures or obstacles in the flooring, you will need to cut the planks accordingly. Most common objects are door frames and floor ducts so make sure you cut the planks to fit around them. You can use a utility knife or tin snips to cut your required shape.
Step 8: Fit Planks

After cutting the planks for protrusions, it’s time to install them. Start by attaching the uncut side of the plank with the adjoining plank. Make sure to hold the cut-out side upward at a 45 degree angle. Then lower the cut-out side slowly until it snaps together with the adjoining plank. Repeat this process for all the planks with special cuts.
Step 9: Final Touches

Once you have installed all the planks, check for any extra gaps. Other than the ¼ inch gap around the wall, the planks should be completely adjoined. If there’s a gap that needs an extra row of planks, you will have to cut the planks again. Check for measurements and then cut accordingly. If the planks are hard to fit because of the space being too narrow, you can use a flooring pull bar. It will help you with easy application of the planks against the adjoining row and the wall.
Wrapping Up!
After you are done, you can reinstall the molding and skirting on the walls. You can either do it manually or use an electric nailer. If your old moldings or trim are damaged or crack, it’s best to replace them.
And, viola! There you have your new vinyl floor. It wasn’t too hard, was it? This step-by-step guide will make sure your DIY flooring project goes smoothly and without any mistakes.