A garage floor is an excellent area to place gym equipment but it requires a leveled or smooth surface for ensured safety. Most of the gym places have sloped surfaces that are covered by heavy machinery and workout materials. It’s an unsafe practice to do a gym workout on an uneven floor surface. During workouts, any equipment can slide over the gym floor due to an unbalanced base. In this article, we have described a complete procedure to deal with a sloped garage gym floor. By implementing our step-by-step guide, you can accomplish your DIY project of leveling the sloped gym floor.
Treatment Of Sloped Garage Gym Floor | A Perfect Guide

In garage gyms, we also use a wide range of flammable materials such as petrochemical oils in large containers. There are probable chances of sliding these containers on the floor surface and causing heavy destruction. In addition, you can’t place multiple heavy machinery on uneven floor surfaces. To avoid all such types of destruction, you should make treatment of your sloped garage gym floor. And, this is the reason PVC Vinyl Flooringis describing the solution in easy steps, read further.
Materials Require To Start DIY Project
- PPE (Gloves & Boots)
- Concrete Material
- Concrete Primer
- Squeegee Broom
- Cement Coating
- Cement Mixing
- Gym Mat Flooring
- Measuring Tape
- Marker Or Chalk
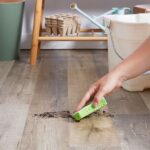
Step 1: Clear The Floor Surface

Before starting the DIY project, you need to clear the gym flooring surface by displacing the heavy equipment. Slide the heavy machinery carefully with the help of experienced workers. Only a clear surface will allow you to treat it with different materials for leveling with no inconvenience.
Step 2: Take Floor Measurements

After clearing the gym area, you should take precise measurements of the uneven area by using the tape measure. Then mark the affected area around the edges with the help of a visible marker or chalk. Marking the uneven surface will be helpful in the precise treatment of the gym floor.
Step 3: Application Of Primer

If the floor surface has large gaps or porous areas, you should fill them with heavy-duty primer materials. After filling these gaps, level them with an appropriate tool/ leveler. The epoxy or acrylic primers are highly excellent for strengthening the joints or gaps on floor surfaces.
Step 4: Mixing Of Cement

For cement preparations, we need to follow the instructions given on self-leveling cement packing. You need an empty bucket to fill with a specific amount of cement powder and water. Leave this bucket for 5-6 minutes to allow complete mixing of both these contents. If the uneven area is large, you should try to make cement material in different batches to keep it wet.
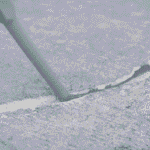
Step 5: Spread The Cement

The next step after the preparation of cement material is to spread it over the sloped area. To spread the cement material over the floor, you need to use a squeegee broom. However, the spreading requires a very quick process to keep the floor surface smooth and leveled. Prevent the material from drying by mixing a small amount of water in it after some time.
Step 6: Let It Dry

After spreading the cement properly, now you need to leave the surface to let it dry. A wide range of cement materials are available in the market– some quick dry materials allow instant dry but some take time to dry. After some time, check the dryness or level of the surface by placing the level over the surface.
Step 7: Top Coats Application

If the floor surface is dried, now you can cover it with protective top coat materials such as oil-based polyurethane. To apply the topcoat layer, dip the soft brush in the topcoat material and rub it over the plain garage floor. The core benefit of applying the topcoat is to protect the floor surface from dents, scratches, and stubborn oil staining.
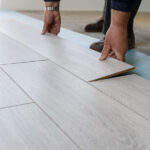
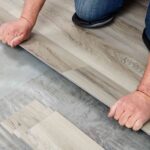
Step 8: Place The Euiqpments Again

Now your sloped garage gym floor is completely ready to place the equipment again on it. But you have also another option of making your gym floor more safe and sound-resistant. You can also fix rubber mats on the floor before placing the gym’s heavy machinery or equipment.
How To Prevent Rolling Of Deadlift On Garage Sloped Floor?
To block the rolling of deadlifts on garage-sloped floor surfaces, we have highlighted some techniques to consider for garage owners. While doing workouts, rolling of deadlifts will be a causative agent for severe type of injuries. And, It is difficult to stop the rolling deadlift on uneven or sloped gym floors with normal force.
Required Materials To Prevent Rolling
- Plywood Strips
- Wood Glue
- Handsaw
- Sanding Material
- Pieces Of Cardboard
Procedure To Install Wooden Strips
- Measure the area of deadlift placement with measuring tape and cut the plywood strips per the required length.
- For the sloped area, you will fix the bent pieces of cardboard under the plywood strips.
- Utilize the heavy-duty glue to tighten the plywood strips with cardboard pieces.
- In this way, you can transform the sloped surface into a plain or even surface.
Wrapping Up!
Dealing with a sloped garage gym floor is not a difficult task but it requires technical skills. PVC Vinyl Flooring has unlocked two key strategies to transform the sloped garage gym floor into a plain and smooth surface. We have uncovered two robust techniques to level the surface with simple wooden strips or cement mixture.